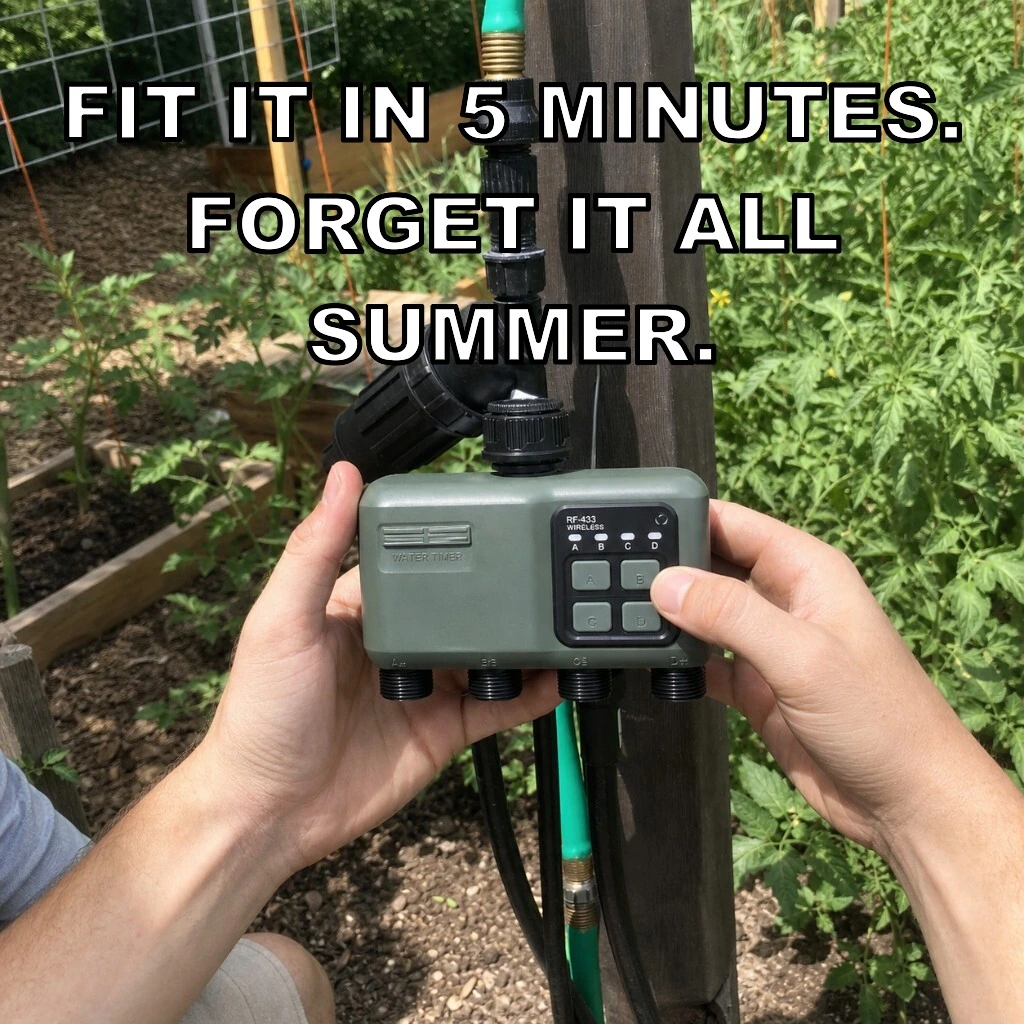
Before you start (checklist)
- Outdoor tap uses BSP thread (usually ¾″ or 1″ — same family as UK garden taps).
- Indoor Type G / 230V wall socket available (garden-facing room is best for signal).
- Phone on 2.4 GHz WiFi for first pairing (5 GHz alone often fails).
- Batteries ready: Johgee = 2× AA alkaline · RainPoint = 4× AA alkaline (not included).
- Hoses / drip lines / sprinklers laid out per zone before you open the tap fully.
Type G plug & BSP tap
Type G / 230V (indoor hub only)
Plug the WiFi gateway / hub into an indoor Type G socket. Never leave the mains hub outdoors in sun or rain. A socket on the garden side of the villa gives the cleanest path to the tap timer.
BSP outdoor tap
Screw the timer onto the tap by hand — no plumber, no pipe cutting. Confirm the washer sits in the collar. Do not wrench plastic threads; if it leaks, reseat the washer instead of forcing tape.
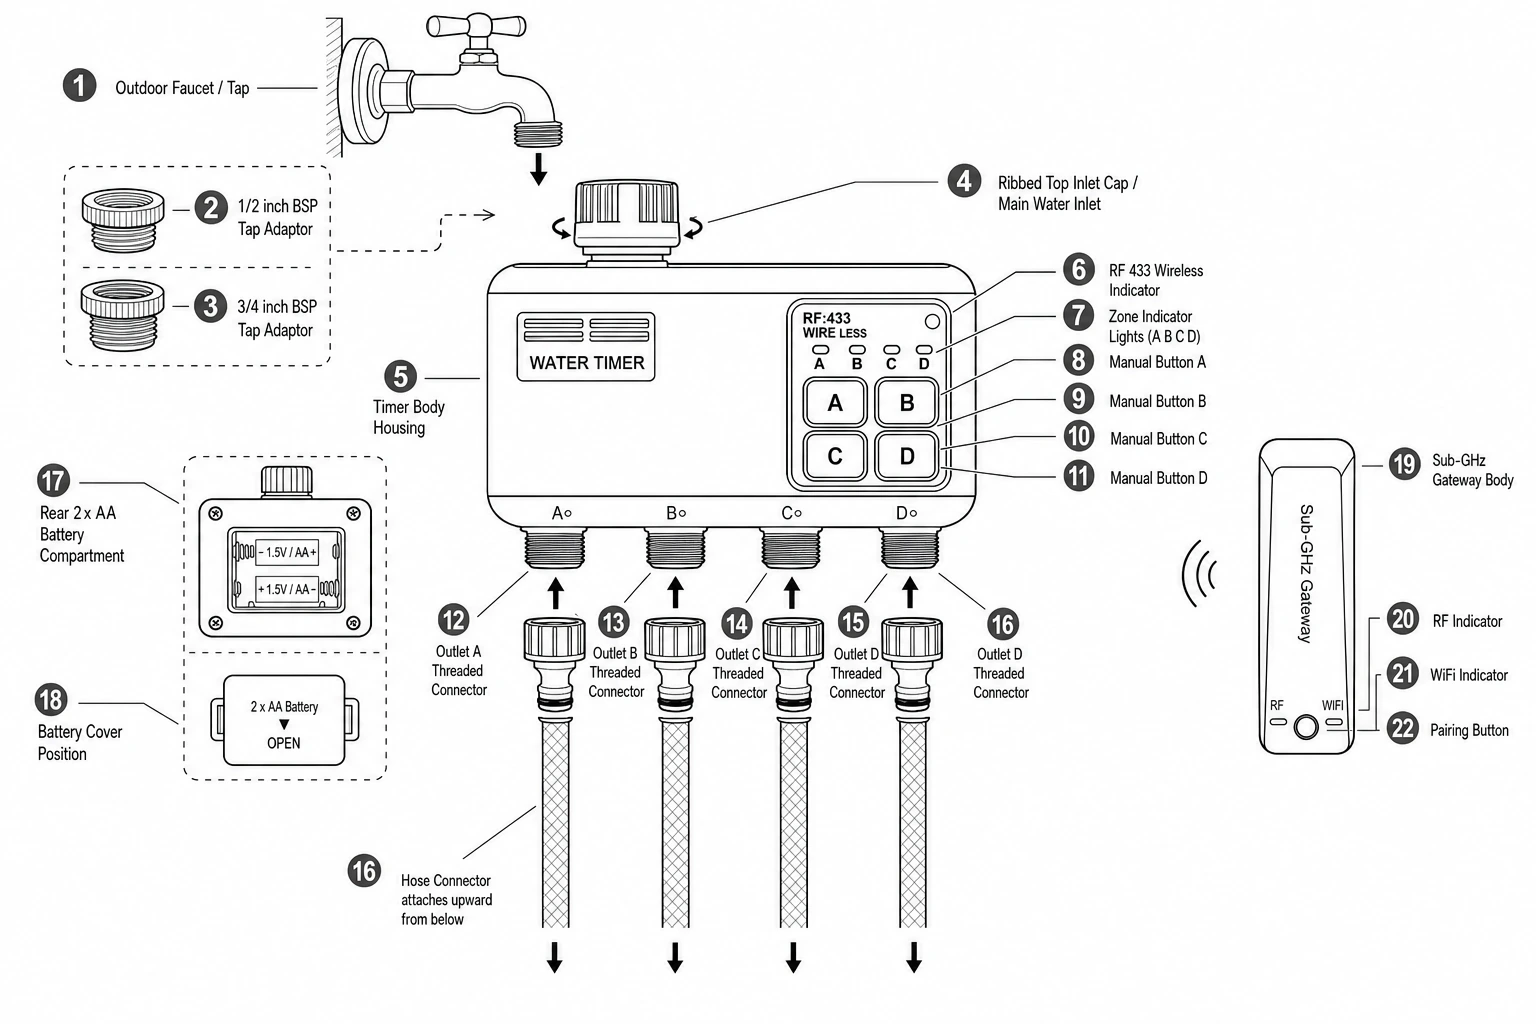
Hardware notes aligned with Johgee / RainPoint UK product how-to (BSP fit, indoor hub, 2.4GHz pairing) — localised for UAE Type G / 230V sockets.
Johgee 4-Zone RF — steps
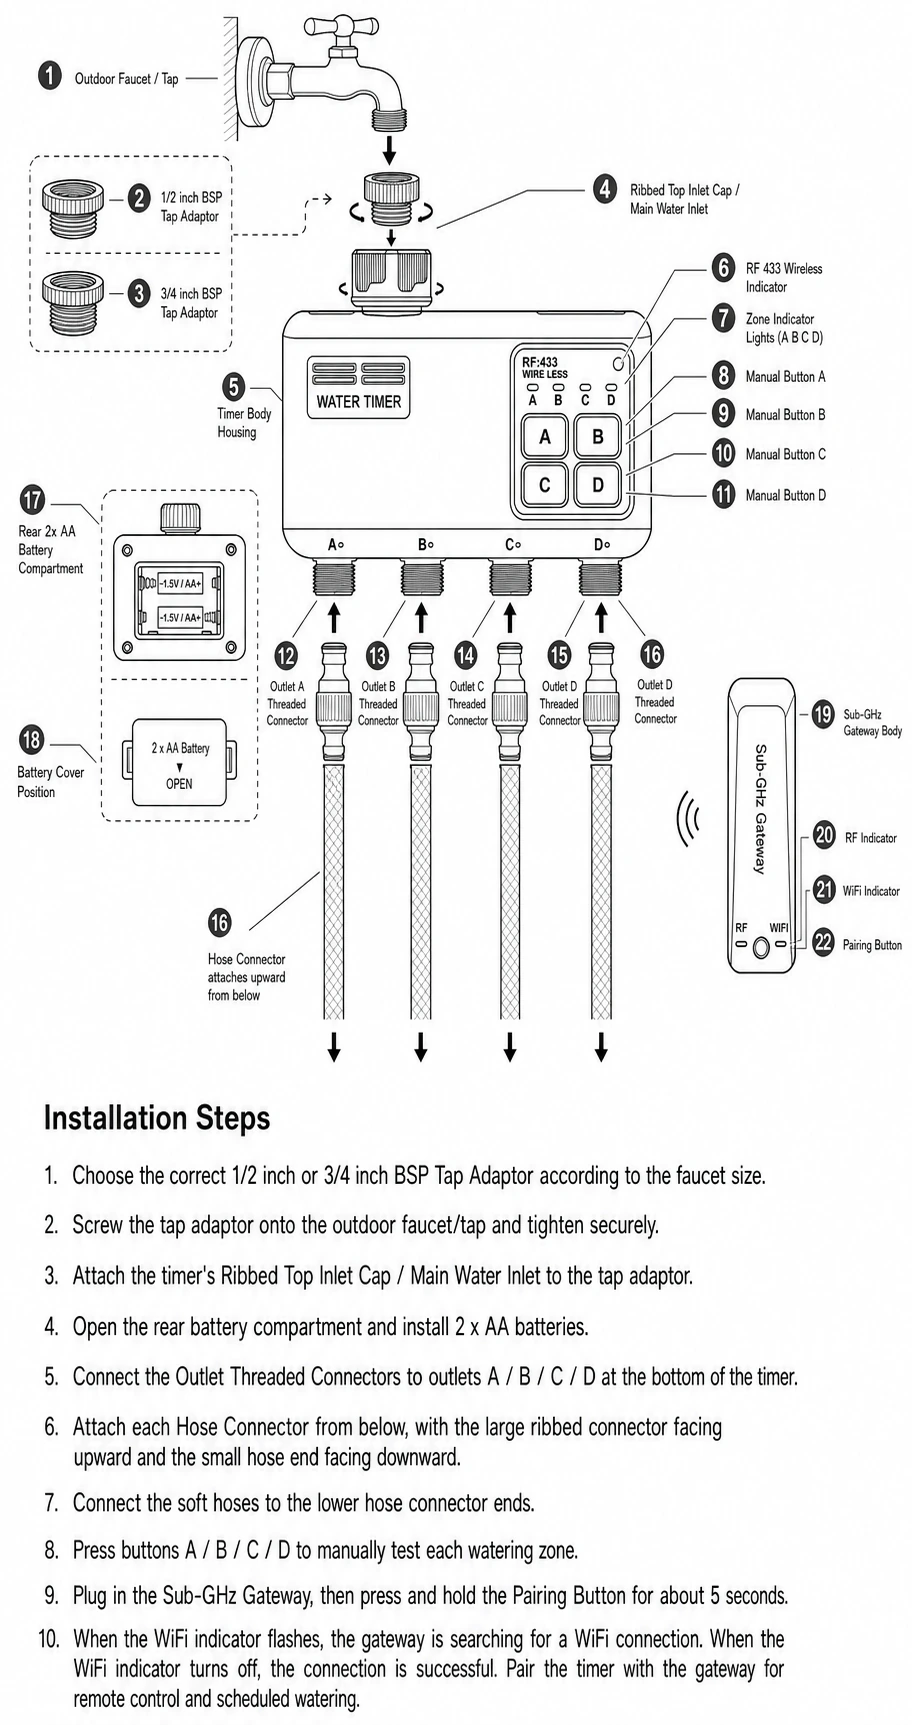
Choose this when the outdoor tap is far from the router or behind thick villa walls. The indoor hub joins 2.4GHz WiFi; the outdoor timer talks to the hub over Sub-1GHz RF (not WiFi at the tap).
- Plug the hub: Indoor Type G socket, garden-facing wall preferred.
- App pairing: In Smart Life / Tuya-compatible app, add the gateway on 2.4 GHz WiFi.
- Batteries: Fit 2× AA alkaline in the outdoor timer; close the cover firmly.
- Tap fit: Hand-screw the timer onto the BSP outdoor tap; check for weeps at the collar.
- RF pair: Press the pairing controls on hub and timer so they link over RF (follow the in-box quick start).
- Four zones: Connect hose / drip / sprinkler to each outlet. Name zones clearly, then set early-morning schedules (UAE heat). Leave the tap fully open — the timer valves do the switching.
Source steps: johgeeirrig.co.uk How to Use (hub → app → batteries → BSP → RF pair → zones).
RainPoint 2-Zone WiFi — steps
Best for balconies, townhouses, and two-zone holiday watering with a simpler WiFi hub setup.
- Batteries: Insert 4× AA alkaline into the timer.
- Tap: Hand-screw onto the BSP outdoor tap (typically ¾″).
- Outlets: Attach hoses, drip lines or sprinklers to the two zone outlets.
- Hub power: Plug the WiFi hub into a Type G / 230V indoor socket; pair on 2.4 GHz.
- Schedules: In the app, set independent times per zone (vacation / holiday schedule before travel).
- Test: Run a short manual cycle on both zones; check leaks and flow. Use rain delay / manual override when weather changes.
Source steps: rainpoirrig.co.uk How to Use (batteries → BSP → outlets → hub pair → schedules).
RF vs WiFi — what the gardener needs to know
| Point | Johgee RF | RainPoint WiFi |
|---|---|---|
| Zones | 4 | 2 |
| Signal path | Indoor WiFi + outdoor RF | WiFi hub ecosystem |
| Pick when | Tap far / thick walls | Smaller garden / 2 zones |
| Outdoor batteries | 2× AA | 4× AA |
| Hub power | Type G / 230V indoors | Type G / 230V indoors |
| Pressure (ref.) | ~0.5–8 bar | See kit / manual |
UAE heat tips
- June–August: if the owner is travelling, set schedules once — do not rely on daily hand watering.
- Avoid long midday runs; prefer early morning or evening windows.
- Keep sand/dust off washers and hose collars; reseat any weeping joint before adding tape.
- If something fails, send the owner a WhatsApp photo of the tap thread and the hub socket.
Owner / buy links (PDP)
This card is for the gardener. Product detail and checkout: